
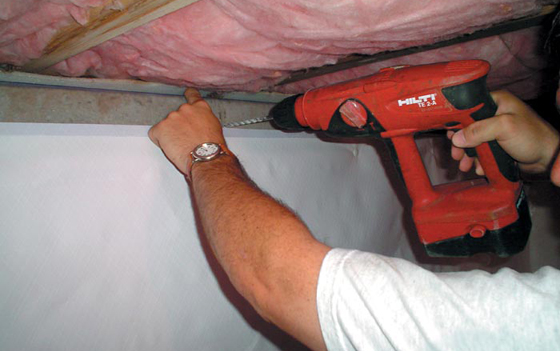

Vapor barriers help keep the ground water that consistently seeps through concrete foundation walls and floor from evaporating into the basement or crawl space. Shown here: crawl space encapsulation by Basement Systems.
Controlling moisture has challenged builders for thousands of years. Too much of it inside a structure can lead to rot, mold, insect infestations. Consequently, roofs and siding, weather-tight windows and doors, and waterproofed basements were developed.
It’s one thing, however, to keep water out but an entirely different thing to keep water vapor out. Water vapor sneaks into (or out of) your home unseen. It rides upon air currents or it simply migrates from areas of high moisture and high temperature to drier, cooler areas.
Vapor barriers, or more accurately vapor diffusion retarders as they are now called, serve to slow the movement of moisture. In doing so, the idea is to keep relative humidity of interior spaces within an acceptable range. Completely stopping the movement of water vapor is not feasible, and probably not desirable either.
Let’s say it is a winter day. Your home is toasty warm. You’re cooking a big family meal. The kids and guests are showering. In short, lots of water vapor is being generated due to the evaporation and respiration. Outside is very cold and dry, so the water vapor in your home is trying to leave. Some escapes through air leaks; some goes right through the walls and ceilings.
The painted drywall of your home, and perhaps the Kraft paper lining of your wall and ceiling insulation are slowing the vapor’s exit. They are your vapor diffusion retarders. If they weren’t there, and all the moist air hit the inside surface of your home’s wall sheathing or roof deck at once, guess what would happen: Condensation would form and saturate the wood, which could of course eventually lead to mold and rot. The liquid water could also degrade batt-type insulation.
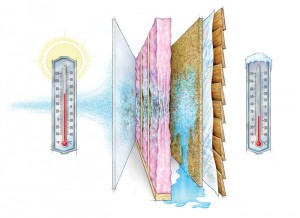
Drawing supplied courtesy of Fine Homebuilding.
If your builder installed polyethylene sheeting behind your drywall, a material that is a Class I vapor retarder (meaning that it lets very little vapor through assuming it was carefully installed), even less water vapor would be able to migrate to the exterior sheathing and siding. A good thing, right?
Not necessarily, at least not if you live in an area where your summers are hot and muggy and cause you to run air conditioning in the summer. Under these conditions, the excess water vapor is outside and trying to get in. If it hits the cool backside of your poly-covered drywall (inside the wall cavity), condensation and the ills it brings is again a possibility.
Does that mean it would be wise to put a vapor retarder against both the interior and exterior surfaces of a wall or ceiling cavity? Absolutely not says Joe Lsterburek, a building scientist with Building Science Corp. “For the record, it makes no sense to have a vapor barrier on both sides of an assembly. If the assembly gets wet or starts out wet we are pretty much doomed…except if we are perfect and we start out dry.” (See Lstiburek’s “Understanding Vapor Barriers,” and “Macbeth Does Vapor Barriers” for more complete discussions of vapor barriers.)
A better solution is to allow for some vapor movement in both directions. In the winter, moisture inside a wall or ceiling can dry to the inside. In summer, it can dry to the outside.
What you need to know
Most homeowners never have to think about vapor barriers – unless they are confronted with decisions about wall coverings, insulation upgrades, or moisture control in a basement or crawlspace. If any of these improvements apply to you, here are some basic principles to keep in mind:
- Vinyl wall covers are like putting polyethylene on the interior surface of a wall. Avoid them if you live in a climate with warm, muggy summers and you plan to use air conditioning.
- Avoid the use of polyethylene as a vapor barrier in new construction. Foil-faced batt insulation should also be avoided. Opt for a vapor retarder that will allow drying to the interior and/or exterior should the wall cavity become wet.
- Stopping air leaks is far more important that stopping water vapor when it comes to controlling moisture. As mentioned above, more water vapor moves by air than by diffusion through building materials. In an existing home, focusing your energy and budget on air sealing is the way to go.
- Ensure good attic ventilation with soffit, gable and/or ridge vents. A well-ventilated attic with help prevent high moisture levels in your walls.
- Choose insulation that can handle with moisture. Many spray foam insulations are unaffected by water. Cellulose and AirKrete insulations can adsorb moisture and hold it until the conditions for drying return. Foam insulations and dense-packed cellulose are desirable because they act as a both a water vapor and air barrier.
- If you do install a Kraft paper-faced fiber insulation batt, discussion which way to face the paper (to the inside or outside) with your local building department. In general, the North American Insulation Manufacturers Association recommends the vapor retarder should be installed inward toward the warm living space in areas where the climate is cold in the winter. In humid climates or areas where there is extensive use of air-conditioning, the vapor barrier should be installed on the exterior side of the wall, if required. For a chart of vapor retarders by climate zone, see the NAIMA’s “Insulation and Vapor Retarders.”
- In crawlspaces, install a Class I vapor barrier, such as a vinyl liner, on walls and floor. In this moisture prone space, you don’t want water vapor from the ground drying to the inside of your home.
 vs Closed (Encapsulated)")


I’m confused about the use of vapor barriers and retarders. I just recently gutted my kitchen down to the studs. I plan to insulate the walls using Roxul rock wool batts between the studs. Do I need to use a vapor barrier or retarder over this material? The house is in Chicago, where the winters are very cold and summers are typically hot and humid, so should I bother using a barrier? The exterior is covered in vinyl siding with Tyvek and a thin foam insulating board. Also, my house has a gambrel roof, with no eaves, but with two gable wall vents and 3 roof vents. How do you vent an attic without eaves?
I have noticed you don’t monetize myhomescience.com, don’t waste
your traffic, you can earn additional bucks every
month with new monetization method. This is the best adsense alternative for
any type of website (they approve all websites), for more info simply search in gooogle: murgrabia’s tools